
Set up conversion tracking in Google Ads
Generate your Conversion ID and Label before touching Tag Manager
Log in
Go to ads.google.com and sign in to your Google Ads account.
Access Conversions
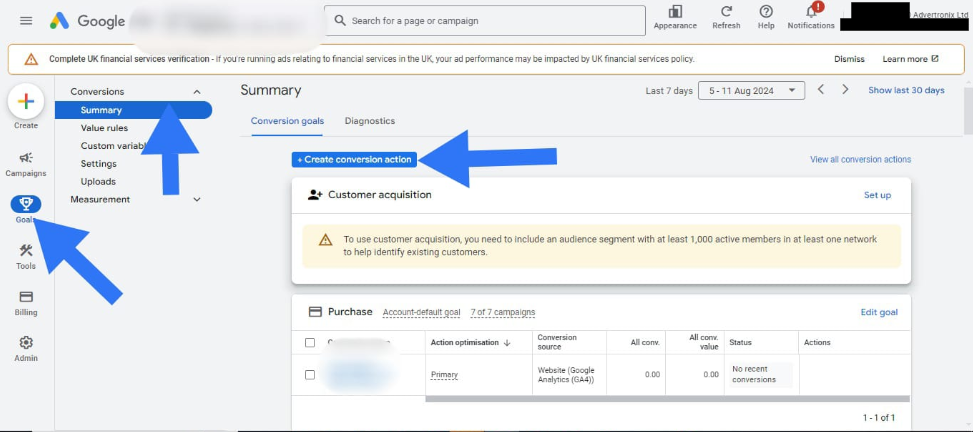
In the left-hand menu, navigate to Goals → Conversions → Summary. This is where all your conversion actions live.
Create a new conversion action
Click the + New conversion action button. You'll be prompted to choose a conversion source — your choice here determines what type of action you're tracking.
Create conversion action for calls from Ads
Track when someone calls directly from your ad
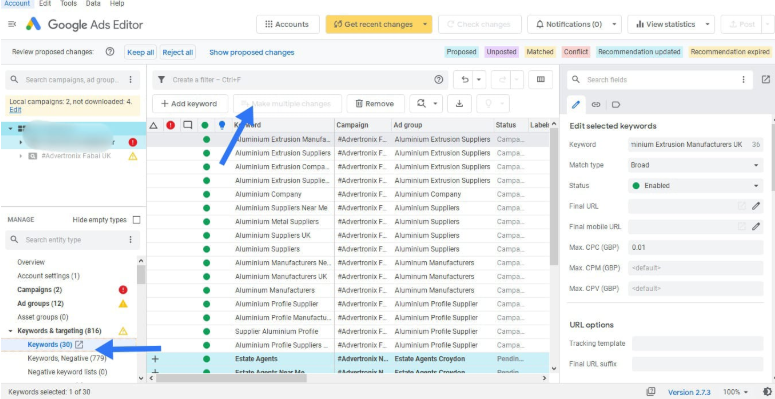
Review your keywords — they should match what your customers are actually searching for. Avoid broad terms.
Choose Conversion Source
Select Phone calls as your conversion source. This covers calls that originate directly from the ad — before the user even reaches your website.

Select Call Type
Choose "Calls from ads using call extensions or call-only ads". This tracks calls made directly from a call extension or call-only ad in search results.
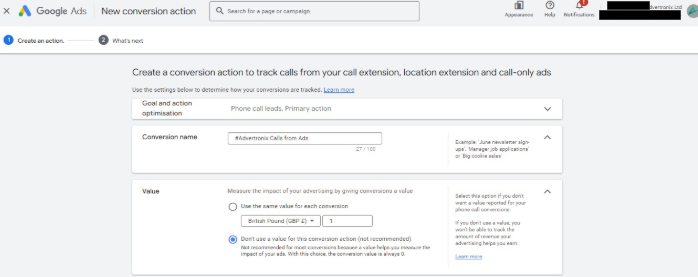
Configure Conversion Settings
Name your conversion action clearly (e.g. "Call from Ad"). Set the minimum call duration — typically 30–60 seconds — so only genuine enquiries are counted as conversions, not wrong numbers.
Save and Continue
Click Save and Continue. Google will generate a unique Conversion ID and Label — save these, as you'll need them in Google Tag Manager.
Create conversion action for calls from Website
Track when someone calls after visiting your site from an ad
Choose Conversion Source
Select Phone calls as the conversion source.
Select Call Type
From the Phone calls source, choose "Calls to a phone number on your website". This uses a dynamically inserted forwarding number to track calls that originated from a Google Ads click.
Configure Conversion Settings
Name this action (e.g. "Call from Website"), set the minimum call duration, assign a value if applicable, and choose your count preference — Every for leads, One for purchases.
Save and Continue
Save the action and note your Conversion ID and Label for use in GTM.
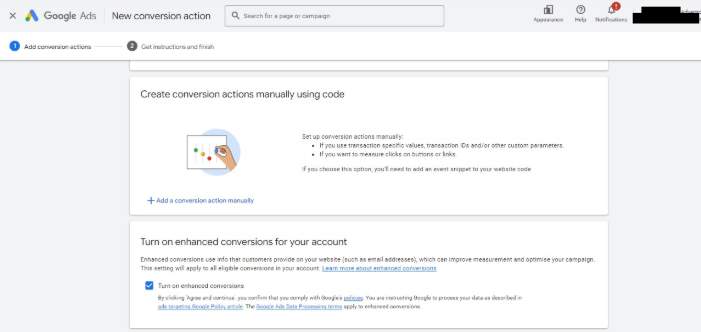
Create conversion action for clicks to install
Track app installs driven by your ad clicks
Choose Conversion Source
Select Website as your source. App install conversions that are tracked via website click-throughs fall under this category.
Select Conversion Category
Choose "Begin checkout" or the most appropriate category for your install flow. This helps Google's bidding algorithms understand the intent behind the conversion.
Configure Conversion Settings
Name the action (e.g. "App Install Click"), assign a value, and set count to One per click since each install counts once.
Save and Continue
Save the action and copy your Conversion ID and Label for GTM configuration.

Create conversion action for form submissions
Track leads generated through contact or quote forms
Small budgets limit your reach — but spending too much without results isn't good either. Start with a budget that matches your goals.
Choose Conversion Source
Select Website as your source. Form submissions are website events fired when a user completes and submits a form on your site.
Select Conversion Category
Choose "Submit lead form". This tells Google's Smart Bidding that this is a lead generation conversion — improving how it optimises your bids towards form completions.
Configure Conversion Settings
Name the action (e.g. "Contact Form Submission"), assign a lead value if known, and set count to Every — each form submission is a new lead opportunity.

Save and Continue
Save the action. You now have your conversion actions set up in Google Ads. Copy the Conversion ID and Label — you'll paste these into GTM tags next.
Implement Tags Using Google Tag Manager
Setting up GTM properly ensures tracking works.
Google Tag Manager acts as a container on your website. Once GTM is installed, you can deploy and manage all your tracking tags — including Google Ads conversion tags — from a single interface without needing a developer each time.
Set up Variables
Variables store reusable values that your tags and triggers can reference. Setting up your Conversion ID as a variable means you only define it once.
- Log in to Google Tag Manager at tagmanager.google.com and open your container.
- Create a New Variable — go to Variables → User-Defined Variables → New.
- Choose Variable Type — select Constant for storing your Conversion ID value.
- Name and save the variable (e.g. "GAds Conversion ID") and paste in your ID from Google Ads.
Set up Triggers
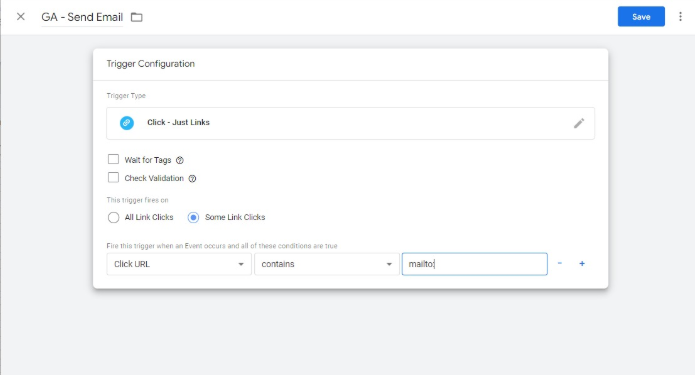
Triggers tell GTM when to fire a tag — for example, when a thank-you page loads or when a form submit button is clicked.
- Create a New Trigger — go to Triggers → New.
- Configure Trigger — for a thank-you page, use Page View trigger type and set the condition to fire when the URL contains /thank-you (or your equivalent confirmation page path).
- Choose Trigger type — for form submissions without a redirect page, use Form Submission trigger type and configure to fire on your specific form.
Create Tags
- Create a New Tag — go to Tags → New.
- Choose Tag Type — select Google Ads Conversion Tracking from the tag type library.
- Configure Tag — enter your Conversion ID (or reference the variable you created) and
the Conversion Label from Google Ads. - Important note
Make sure your Conversion ID matches the account-level ID from Google Ads, and that each Conversion Label is unique to the specific conversion action. Mixing labels will result in incorrect data.
- Assign Triggers to Tag — in the Triggering section of the tag, attach the trigger you created in step B.
The tag will only fire when that trigger condition is met.
Preview, test, and publish
Before going live, always test your tags to confirm they fire correctly.
- Preview Tag Manager — click the Preview button in GTM. This opens your website with the GTM debug panel active so you can see which tags fire on each page action.
- Test the conversion — complete the action on your website (e.g. submit the form or navigate to the thank-you page). Confirm the tag fires in the debug panel without errors.
- Publish the Container — once confirmed, click Submit → Publish in GTM. Your conversion tracking is now live. Allow 24–48 hours for conversions to appear in Google Ads.